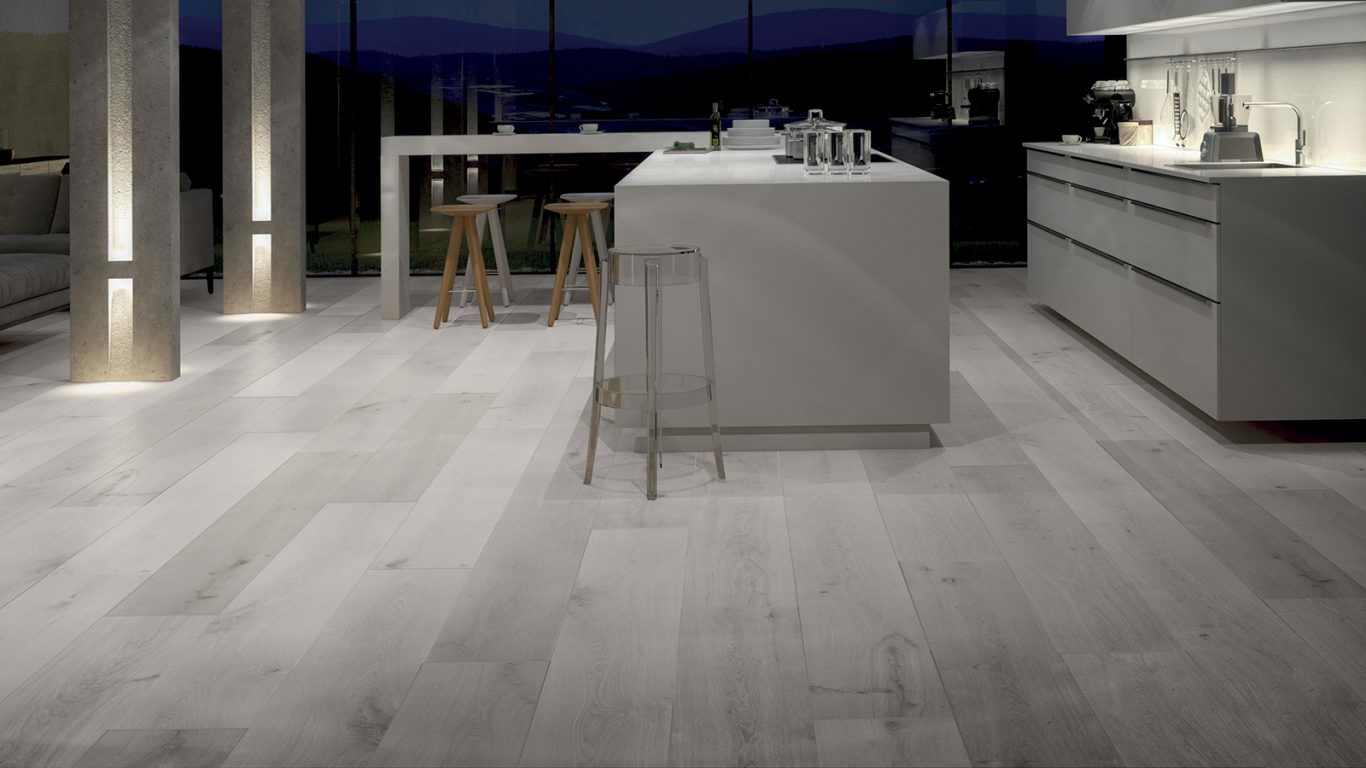
Flooring - Ardesia EV 5044 - Evolution Velox


Evolution Velox
Evolution Velox is particularly suitable for laying on raised floors.
The use of the special glue with a peel-off effect allows a very fast and effortless installation.
It is made up of 8 layers which are hot-coupled by pressing.
Usage classes and classifications
Composition
Vinyl floor consisting of:
- 0.55 mm wear layer made of pure transparent PVC
- 0.10mm printed layer in pure PVC printed with innovative techniques
- 0.80 mm intermediate stabilizer anti torsion layer
- 0.10 mm stabilizing fibreglass sheet
- 0.80 mm intermediate stabilizer anti torsion layer
- 0.10 mm stabilizing fibreglass sheet
- 2.45 mm stabilizing anti torsion layer
- 0.10 bonding layer
The components are hot-coupled by non-continuous pressing.

Pile up the boxes of Evolution Velox in stacks up to a maximum of 7 boxes, in the same room where the installation will take place.
Acclimatize the material at least 24 hours prior to starting the installation at a minimum temperature of 18°C. T
he temperature must be kept all along the installation.
The substrate minimum temperature must be around 13°C with and the relative humidity inside the room should be between 35% and 65%.
The substrate must be flat, smooth, dry, solid, free of cracks, stable and moisture-proof.
Choose the leveling grout to be used following the manufacturer's instructions according to the type of foot traffic the installed floor will be subject to.
The correct functioning of the heating system must be checked prior to starting the installation work.
Make sure that the underfloor heating is switched off at least 48 hours prior to the installation and that it stays switched off for at least 48 hours after installation is complete.
When the heating system is switched on again, gradually increase the temperature over several days, increasing by a few degrees each day, until the desired temperature is reached.
The temperature must never exceed 27°C on the backing of the floor in contact with the substrate.
Prior to starting the installation, determine the type to be followed taking into account the shape of the room and the light angle of incidence.
Prior to installing the first row of planks, check that the planks cut close to the wall have a width of at least 10 cm.
Near doors and corners, the cut planks cannot be less than half of a whole plank.
The planks have arrows on their back showing the installation direction.
Use an adhesive such as Mapei Ultrabond Eco Tack 4 LVT.
Apply according to the methods and quantities shown by the manufacturer.
Be sure to apply enough so the floor does not get "slippery".
Check whether the application of a suitable primer is required to regulate absorbency.
Fix the planks next to each other.
Apply a roller. In given conditions (ramps, steps, areas subject to intense solar heat), it is necessary to use a permanent bonding adhesive.
Stand by 48 to 72 hours prior to opening the area to foot traffic and moving furniture.
In case of work to be carried out after installation, the floor must be protected with suitable rigid cardboard or plywood panels. If you need to use duct tape, do not apply it directly onto the floor.
Do not subject newly installed surfaces to heavy traffic with wheels as this may cause the slats and planks to slide.
Use an adhesive such as Mapei Ultrabond Eco Tack 4 LVT. Apply according to the methods and quantities shown by the manufacturer.
Be sure to apply enough so the floor does not get "slippery".
Check whether the application of a suitable primer is required to regulate absorbency.
Fix the planks next to each other.
Apply a roller.
In given conditions (ramps, steps, areas subject to intense solar heat), it is necessary to use a permanent bonding adhesive.
Stand by 48 to 72 hours prior to opening the area to foot traffic and moving furniture.
In case of work to be carried out after installation, the floor must be protected with suitable rigid cardboard or plywood panels.
If you need to use duct tape, do not apply it directly onto the floor.
Do not subject newly installed surfaces to heavy traffic with wheels as this may cause the slats and planks to slide.

Cleaning and maintenance instructions
A surface careful cleaning is recommended at the end of the installation.
Any adhesive residues must be removed using denatured ethyl alcohol and a dry cloth.
If there are stains, use a detergent such as Evo Virag, then remove dirt and dust residues with a damp or dry cloth.

Contact us for any information about our products